Step 1: Login to Databricks account
Step 2: You will get “Welcome to databricks” screen
Step 3: Go and create “Cluster”, if it is not running.
(Please see “How to create a new Cluster in Databricks?”
blog for further details)
Step 4: Screenshot of sample Employee CSV file.
Step 5: Click on “Data” and “AddData” button.
Step 6: Click on “Browse” link to choose the CSV file.
Step 7: You will get below screen with selected CSV file.
Step 8 : Click on “Create Table with UI” and then select “Cluster”.
Step 9: Click on “Preview Table”. You will get below screen.
Step 10: Give a new table name (if it already exists), then
select “First row is header” and “Infer Schema”. These 2 options will be immediately
reflected in “Table Preview”.
Step 11: Click on “Create Table”. This will create a new table
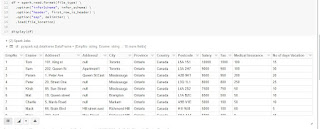
and will show the schema and sample data in a new screen as shown below.
PS: You can use this table in other notebooks, because table
is created permanently.


