Thursday, December 27, 2018

How to create table and load data in Databricks from a file (in CSV format or any structured)? (Approach 2)


Step 1:  Login to Databricks account


Step 2: You will get “Welcome to databricks” screen


Step 3: Go and create “Cluster”, if it is not running.
(Please see “How to create a new Cluster in Databricks?” blog for further details)


Step 4: Screenshot of sample Employee CSV file.


Step 5: Click on “Data” and “AddData” button.


Step 6: Click on “Browse” link to choose the CSV file.


Step 7: You will get below screen with selected CSV file.


Step 8 : Click on “Create Table with UI” and then select “Cluster”.


Step 9: Click on “Preview Table”. You will get below screen.


Step 10: Give a new table name (if it already exists), then select “First row is header” and “Infer Schema”. These 2 options will be immediately reflected in “Table Preview”.


Step 11: Click on “Create Table”. This will create a new table and will show the schema and sample data in a new screen as shown below.


PS: You can use this table in other notebooks, because table is created permanently.

How to create table and load data in Databricks from a file (in CSV format or any structured format)? (Approach 1)


Step 1:  Login to Databricks account


Step 2: You will get “Welcome to databricks” screen


Step 3: Go and create “Cluster”, if it is not running.
(Please see “How to create a new Cluster in Databricks?” blog for further details)


Step 4: Screenshot of sample Employee CSV file.


Step 5: Click on “Data” and “AddData” button.


Step 6: Click on “Browse” link to choose the CSV file.


Step 7: You will get below screen with selected CSV file.


Step 8: Click on “Create Table in Notebook” button in above screen. You will get below window.


Step 9: Since the first row is header, you need to change ‘ first_row_is_header = ”true” ‘ in the cell as shown below.


Step 10: Click on “Run Cell” to load the data into databricks.


Key points in above screen are:
                First Row is header
                Column delimiter is comma


Step 11: You will get below screen, with list of records. The key point is that a Spark Job will be executed to load the data in databricks environment.


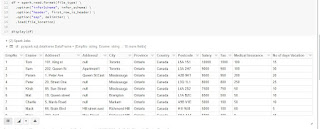
Step 12: Run the below step. It creates temporary table from the CSV file.


Step 13: In this step, you have switches to “sql” mode and listing down all records from temp table (EmployeeTable_Sample_csv).


Step 14: Create a permanent table. This format of this table is “parquet”.


Step 15: I changed the permanent table as “EmployeeTable”. Please find the below 2 screenshots for your reference.


Step 16: You can use normal Query to find Sum, Average and other functions.


Step 17: Below query is used for extracting employees who’s Tax are greater than or equal to 10% of their salary.


Step 18: Without writing code, you can group number of employees by their vacations. You need to click on Graph => Bar Chart => Plot options => Select “Series Grouping” as “NoofDaysVacation”, in “Values” select “EmpNo” and then in “Aggregation” choose “count”. Click on “Apply” button to view the plot / graph in the notebook.


Tuesday, December 25, 2018

How to create a new Notebook in Databricks?


Notebook is the place where you write code in Python, Scala, SQL or R. In a notebook you can write a block in Python and other block in Scala or any other language. During run time code the code executes and shows the output regardless on the language its written.


You can execute your notebook step by step by clicking on “Run” option in each cell or you can run the whole notebook by clicking on “RullAll” at the top.
Ensure you have attached a cluster before click on “Run” icon.


Steps to create a new Notebook


Step 1:  Login to Databricks account


Step 2: You will get “Welcome to databricks” screen


Step 3: Click on “Workspace”, then “Create” and “Notebook”.


Step 4: Give the Notebook name and choose your Language in which you are planning to write code.


Step 5: Click on Detached dropdown and Attach your cluster. In below example “MyClusterOne” is the cluster name.


Step 6: You can see the cluster is added to the notebook.


Step 7:  Now, write code in your Notebook. Please find sample python program (printing “Hello World” text). Click on “Run Cell” to execute the program.


Step 8: Below program finds sum and average salaries.


Step 9: You can add new cells by clicking on “+”


Step 10: From document perspective you can write comments in the Cell as shown below:


Step 11: You can run all the code in a Notebook by clicking on “Run All” icon.


Step 12: Please find sample code written in multiple languages in a single workbook.


sample SQL code in same notebook


How to create a new Cluster in Databricks?

Cluster is the place where the actual code is executed. The code is generally written in notebooks and it can be executed in 2 ways (a. Interactively in Notebook or b. By Scheduled Jobs). With Databricks, we can easily manage clusters (like Create, Edit, Start, Terminate, Delete, Clone and etc…)


Steps to create a new cluster


Step 1:  Login to Databricks account


Step 2: You will get “Welcome to databricks” screen


Step 3: Click on Clusters


Step 4: Click on “Create Cluster”, you will get below screen


Step 5: Give Cluster Name (in below example its “ClusterOne”), select Databricks Runtime Version, Python Version and Availability Zone. Click on “Create Cluster” button.


Step 6: A new cluster will be created after few mins, as shown below.


Step 7 : You can click on Spark UI to find more details about cluster


ClusterOne is created in AWS cloud service


Additional Info :
Please note: In trail version, if the cluster is inactive for 2 hours or more continuously, then it will be terminated automatically.  Hence you need to create the cluster again.


Next Step: Create a Notebook